Picking Orders
Picking Orders
Picking orders requires a picking list to be created. Below is a guide on how to configure your settings for picking lists as well as how to create a picking list and start picking.
Picking List Settings.
To pick orders, we first need to create a picking list.
For the system to understand which orders should be picked, we must first set up the rules for picking lists.
To do so, use the left side panel and navigate to Advanced > Settings.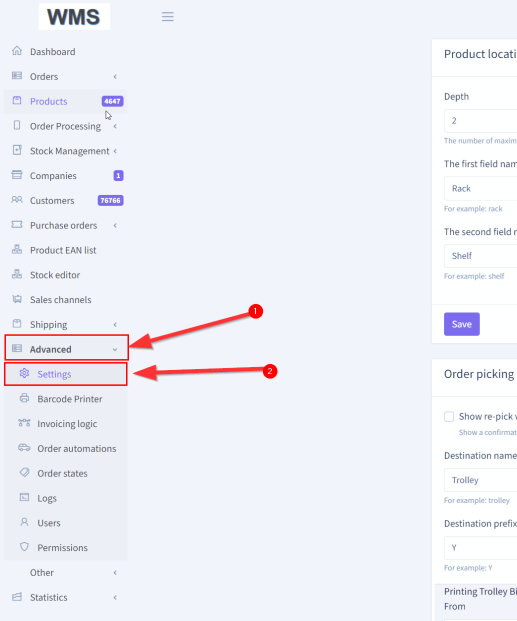
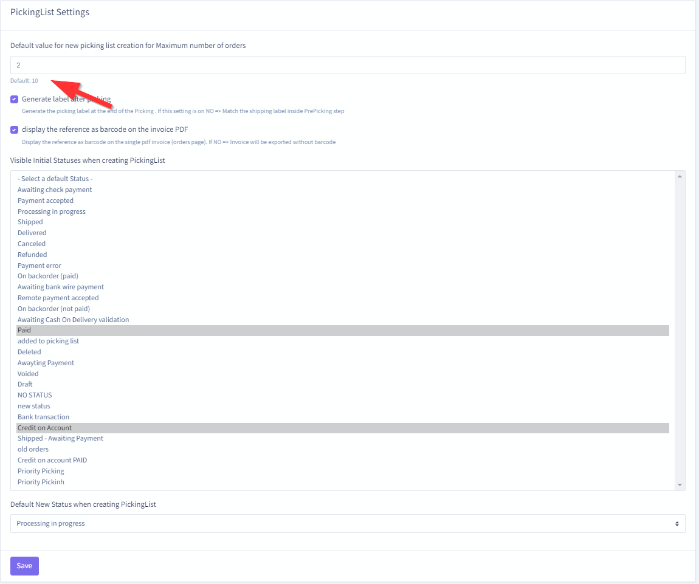
Default value for new picking list creation for Maximum number of orders:
This option lets you configure the default number of orders you want per picking list creation.
This will be the default number of orders processed for each picking list you create. You can change this during picking list creation, but the default value will be set in this section.
This is useful if you always pick, for example, two orders; the warehouse workers creating the list will not have to type in the number of orders to process every time.
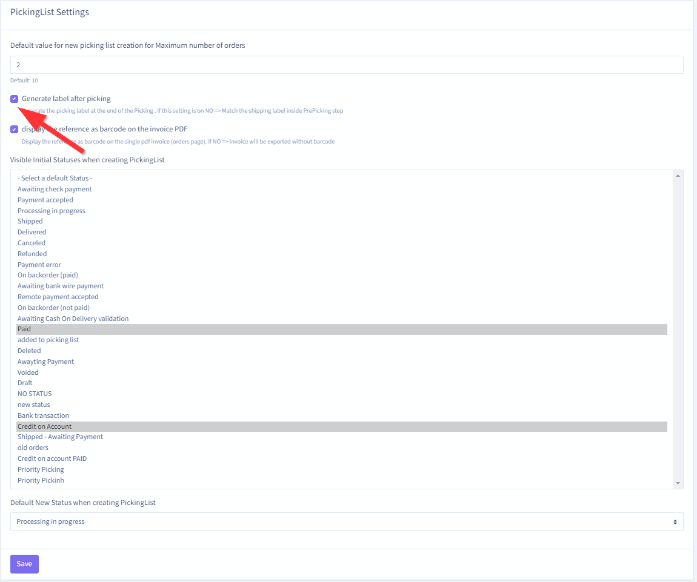
Generate label after picking
This option lets you specify if you want to create the shipping labels (if you use this feature) during or after the creation of the picking list.
We recommend that larger warehouses that need to weigh their parcels manually or split their orders into several boxes print their shipping labels after the picking list creation, as there is no way to specify the number of boxes or the weight of the parcels if you do it at the same time as the picking list creation.
Warehouses that send all or most of their parcels in 1 parcel per order can use the feature to create the shipping label simultaneously. The system will automatically use the weight of the order for each shipment when sending over the information to the carrier used.
When printing labels at the same time as the picking list, each label will have to be scanned and matched to the picking slip or invoice of that order to ensure there is no mixup.
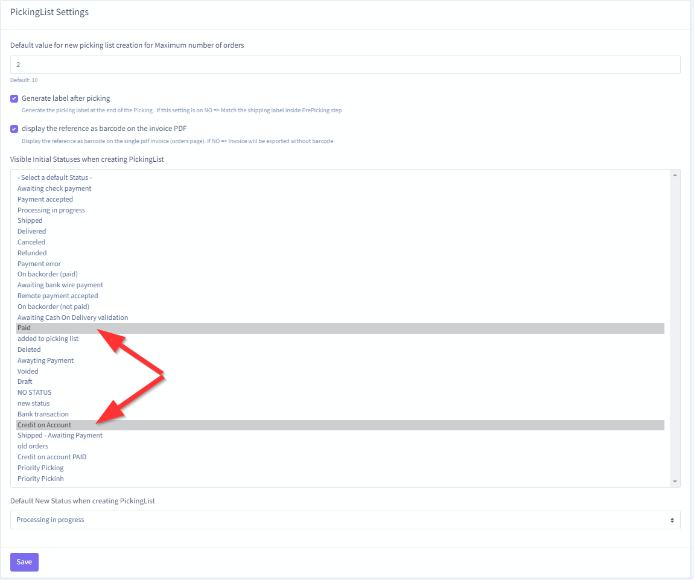
Visible Initial Statuses when creating PickingList
This option lets you select which order status an order should have to get processed and picked.
During picking list creation, these can be changed manually, but the selection made here will be the default status that gets processed.
Normally you would want to only process paid orders, but if you have several different statuses that need to be processed, such as credit on account orders or anything else, you can hold down the CTRL key on your keyboard and select all the statuses you wish the warehouse to process.
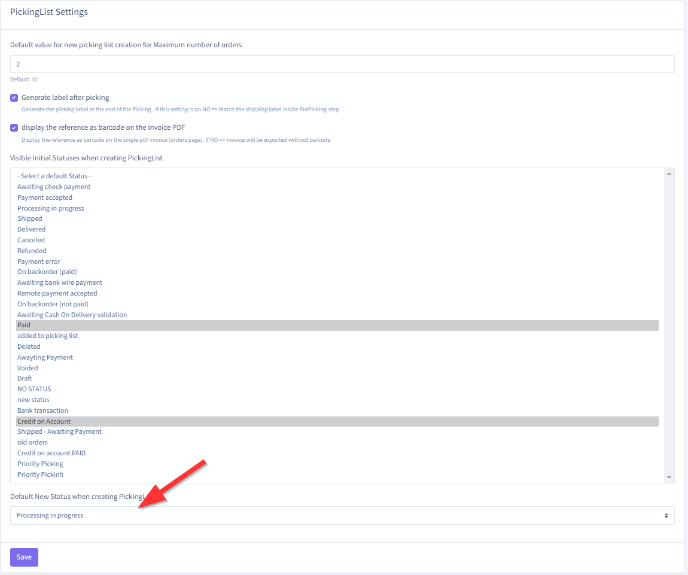
Default New Status when creating PickingList
This option lets you specify the new status an order should be assigned to once it is picked. This is usually something like Preparation in progress.
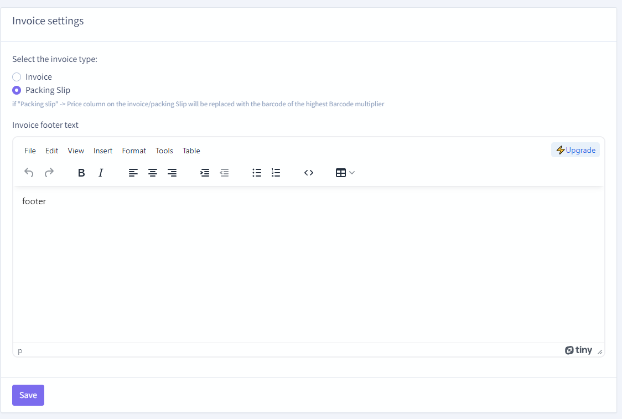
Invoice settings
Scroll down to the bottom to find Invoice settings; this lets you specify the type of paperwork to print for your picking lists. You can select if you want to create a packing slip or an invoice for your picking lists.
Picking Bin settings
Picking bins are the bins that each order will get picked into. If you are processing, for example, two orders at a time, you would need at least two picking bins.
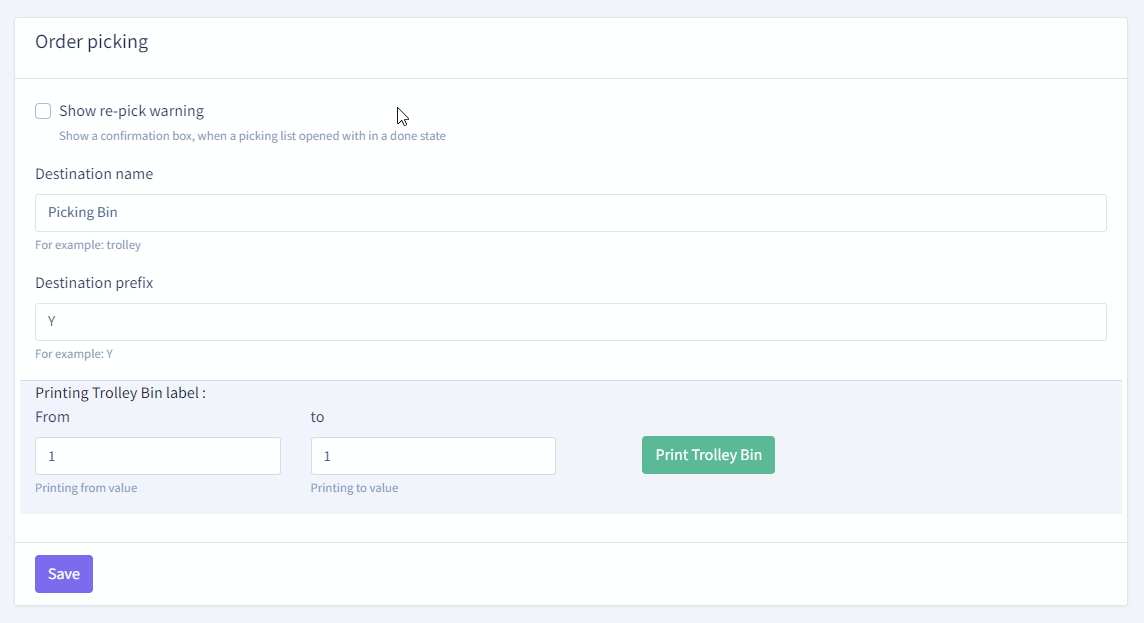
Show re-pick warning
This option shows a warning if a user tries to pick a picking list already done (we strongly recommend leaving this option on).
Destination name
This is the name of the bin that will be displayed on the scanner when picking.
Destination prefix
This is the "label" you will give your picking bins. This can be anything, but we strongly suggest keeping it short and sweet. Each order will get assigned a destination bin, and the prefix you define here will be displayed on the barcode label and the scanner for where to put the products when picked.
Printing Trolley Bin label
This option lets you print a range of picking bin labels based on the prefixed set above. For example, using the setting above, and if we changed it from 1 to 5 it would print picking bin labels Y1, Y2, Y3, Y4 and Y5.
Creating a Picking List
To create a new picking list, use the left side menu, navigate to Order Processing > Picking Lists > and click the + New Picking list button.
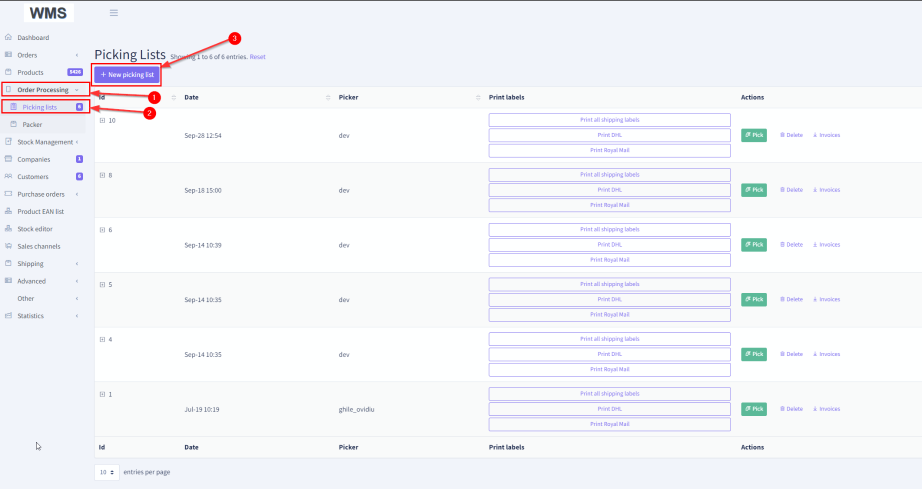
Your new picking list creation window will open, and your predefined values will be filled in.
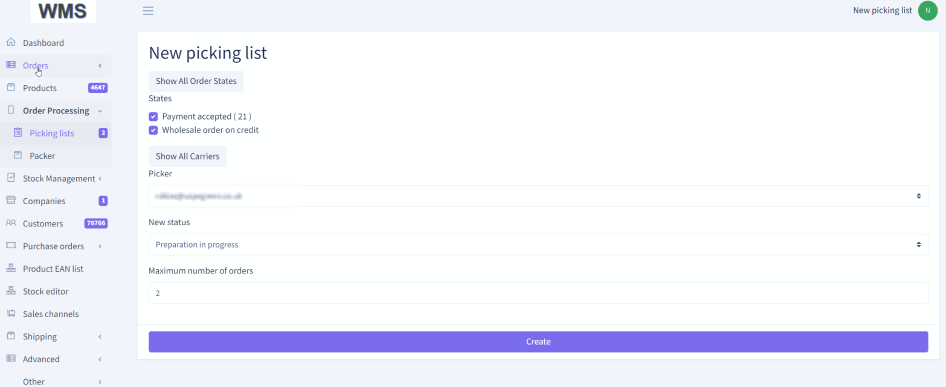
State is the predefined value that you set up earlier using the "Visible Initial Statuses when creating PickingList" in settings.
You can click the button above the statuses you specified, "Show all order states" if you wish to include orders in a different order state from what you predefined in your settings.
You can select to only process orders using a specific carrier (shipping option). Just click the Show All Carriers button and make a selection.
The picker option will give you a dropdown of all staff members on the system so that you can select which staff member will pick the specific picking list.
New Status is the status that your orders will change to once you create the picking list; the default setting for this is the one we configured earlier in "Default New Status when creating PickingList"
Lastly, you can specify how many orders to pick on this picking list; the default value will be the value we specified in settings earlier in "Default value for new picking list creation for the Maximum number of orders" This can, however, be changed if you want to process a different amount of orders.
Start Picking
Once your picking list has been created, it will be displayed at the top of the list. It will be assigned a Picking List number along with the date, staff member name and most importantly, a Green icon showing you that it is ready to be picked.
Before you grab your mobile scanner, print the paperwork. this will be either an invoice or a packing slip, depending on your configuration.
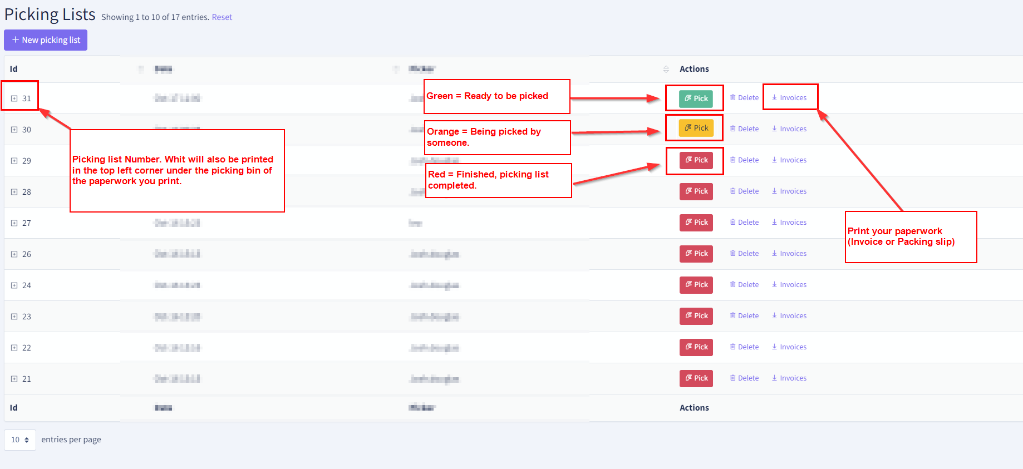
Green = Ready to be Picked
Orange = Picking in Progress (someone has started picking this picking list)
Red = Completed; this picking list has been picked and completed.
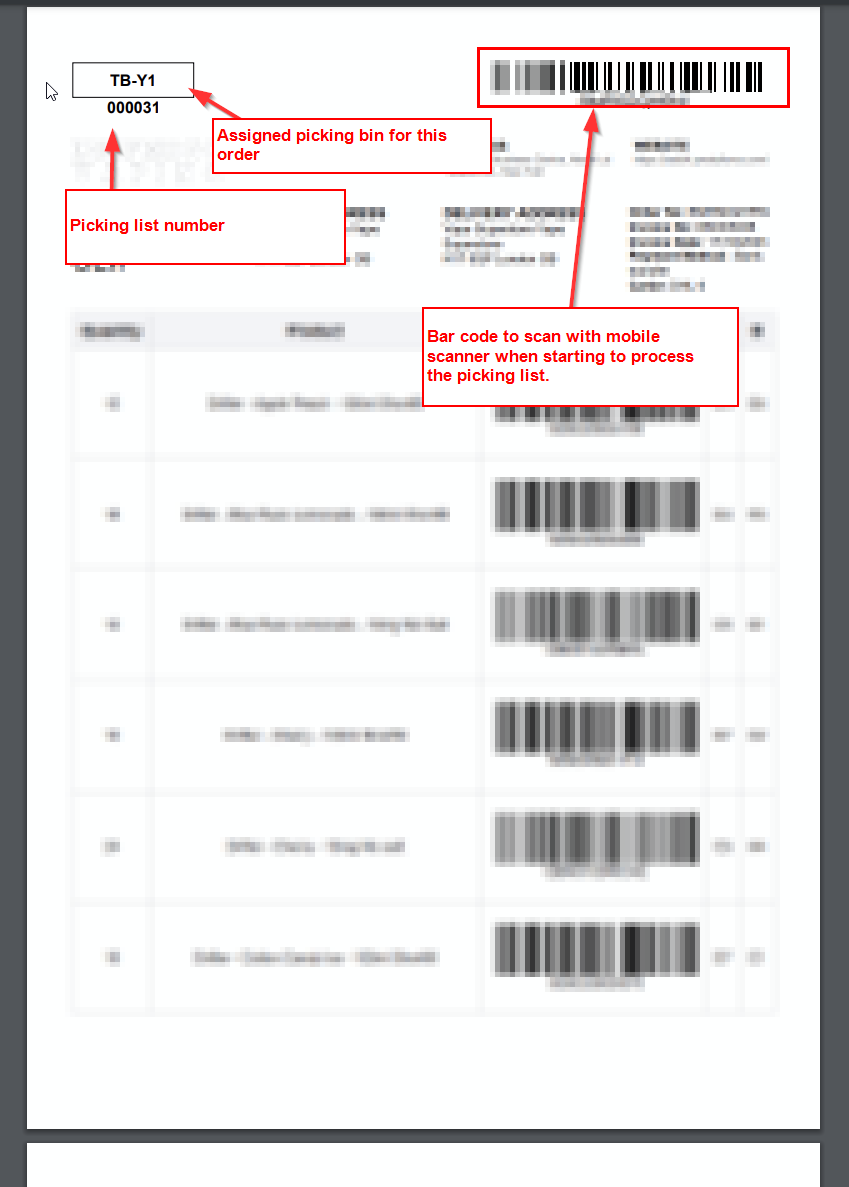
Picking list Paperwork
Once you print your invoice OR packing slip